A “Press Here” Birthday Party

Our little girl turned four.  One of my very first posts was her Totoro party when she turned 2 and then her Lava party last year. I love her what interests her and she always makes it fun for me to work on a party theme. Her favorite book is “Press Here” by Hervé Tullet.  It is such a simple yet really clever book and perfect for her fourth birthday.

Our home has huge windows throughout. We made each set of windows a page of dots from the book using tissue paper and a circle cutter to make the dots.img_4739img_4732img_4723
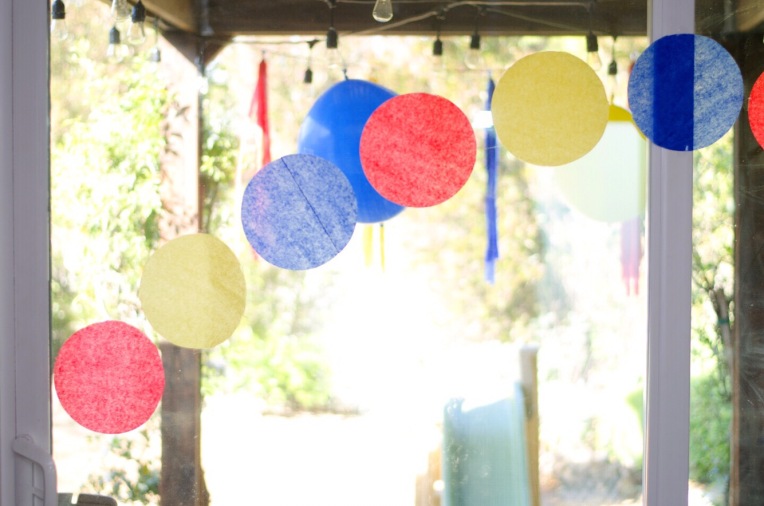
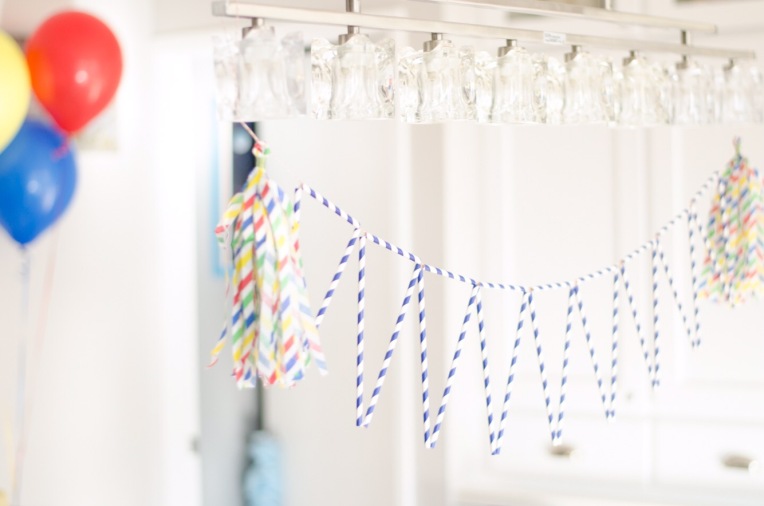
I love the look and idea of the paper straw, but I don’t like using them as a straw.  Strange, I know, but I hate the feeling of the paper getting soft in the drink. I found a great tutorial from Oleander + Palm on straw bunting. Super easy and I love the minimalist look!img_473320170319-ellie4thparty-002
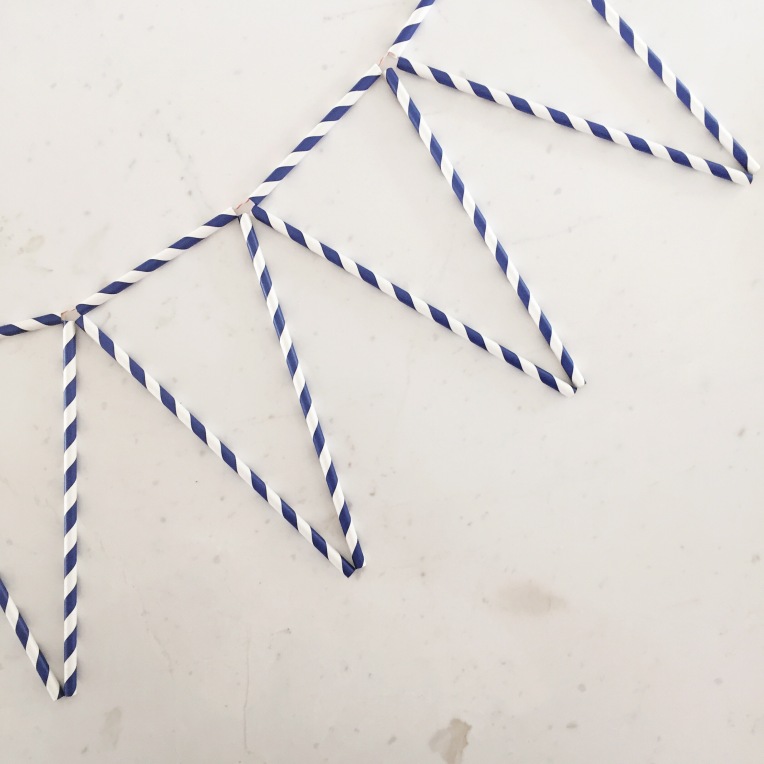
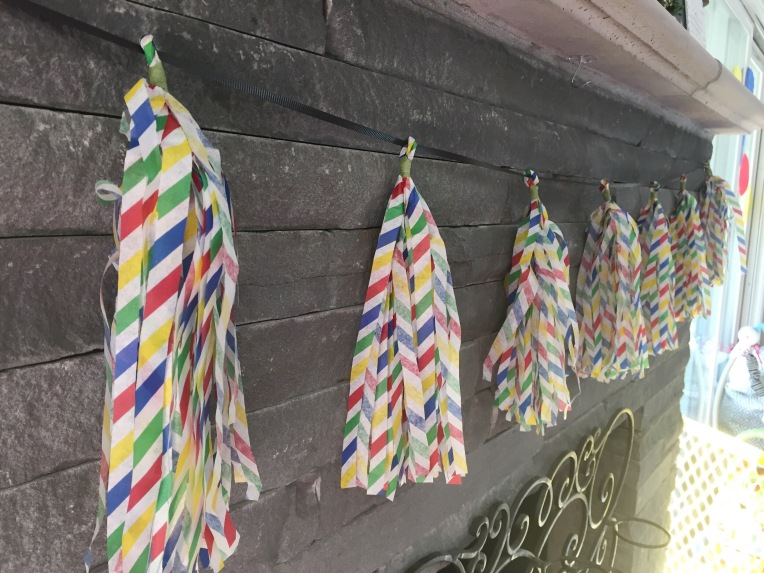
My greatest discovery this time around: CREPE PAPER garland! I might never make another tissue paper garland again! Tutorial to come…img_4729img_4750Love love love helium balloons, but they can be expensive if renting a tank and a bit of a pain if your order and have to pick up the day of the party. ***TIP*** Order them for the day before with hi-float and they will last 3-4 days if not longer! Also, if you feel the space is a bit cluttered already for balloons, try putting them in the corners of the room. (A tip from the hubs, believe it or not!)img_4751Great discovery #2! PUNCH BALL BALLOONS! Most, if not all of my party decor was from the dollar store including these punch ball balloons. Blow them up and hang them from the ceiling! Since they are shaped a bit differently from regular balloons, you can even hang streamers or ribbon from the bottoms as well!img_4744img_4737img_4752
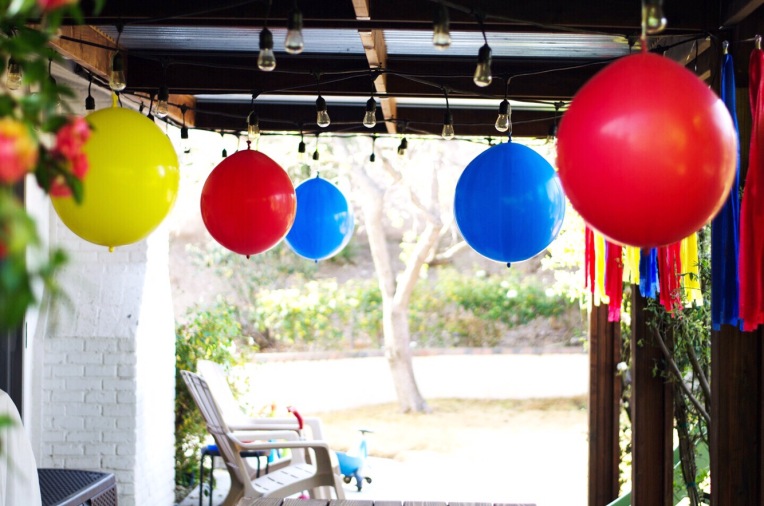
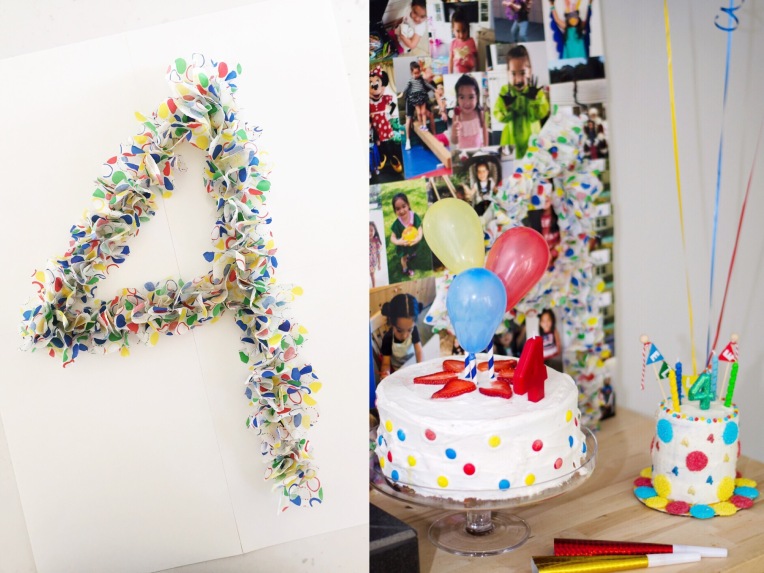
The highlight of the party was definitely the cakes. I am not an experienced baker, but Once Upon A Pedestal made this polka dot cake extremely manageable with a cake pop pan, food coloring and boxed cake mix!img_4753
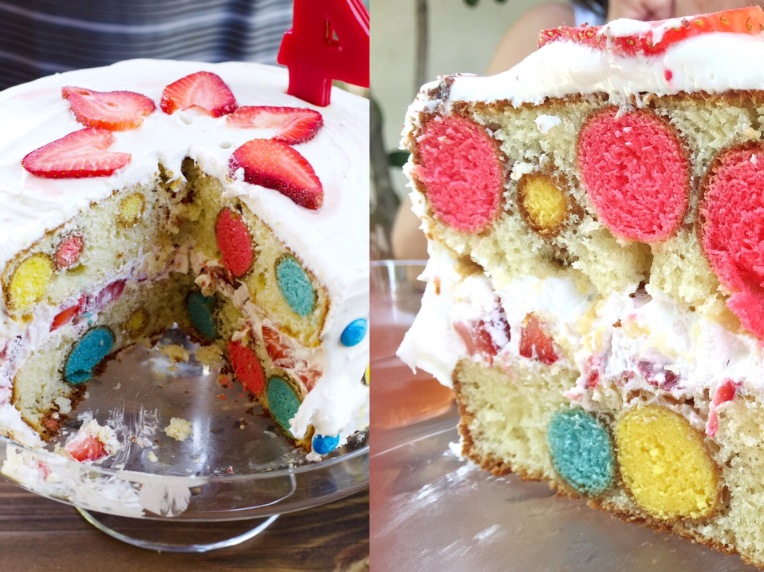
My sister made this four-tiered adorable chocolate mini cake just for Ellie, complete with her own banner and homemade white chocolate nonpareils.img_4731Since we decided to have a small party this year, I knew there would not be many kids her age present as Ellie is the oldest cousin.  I wanted something fun and interactive for her, so we made these “Press Here” inspired cards for her to play.img_4527
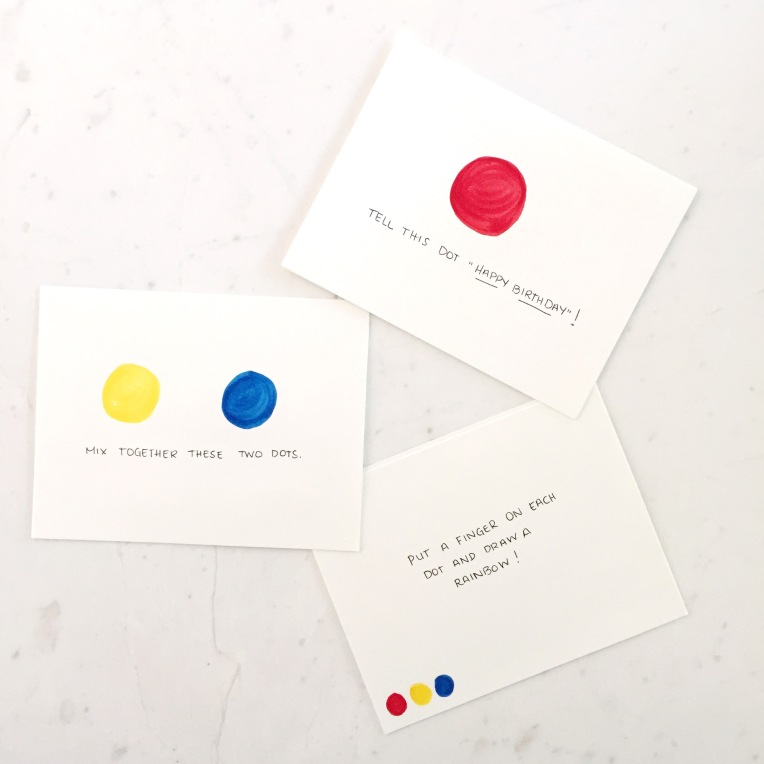
Our whole family was great sports in each picking out a card and wearing it so Ellie could go up to them and play her game. (Left says “Smell this dot.” Right says “Poke Me!”.)img_4754

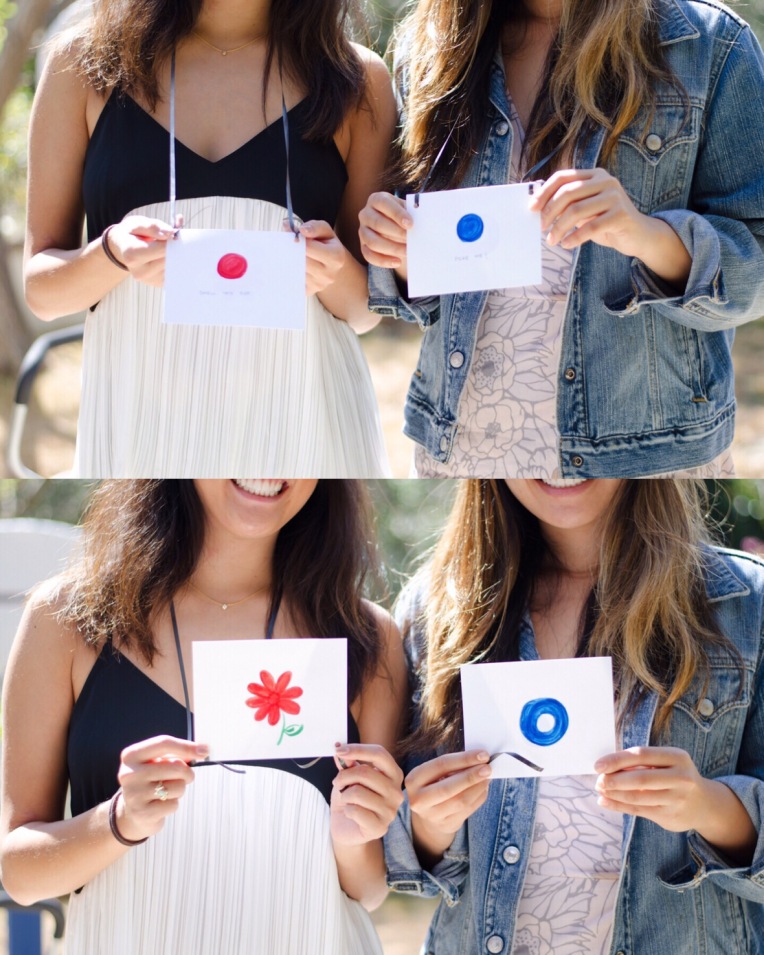
I think Ellie had the best time. I know we did.  I can’t wait to see what she is interested in next year!


Save

Save

Twin Baby Room

The twins are 8 months already (!?!) and I have been meaning to share the nursery. (Can you even call it that anymore?)

img_0673
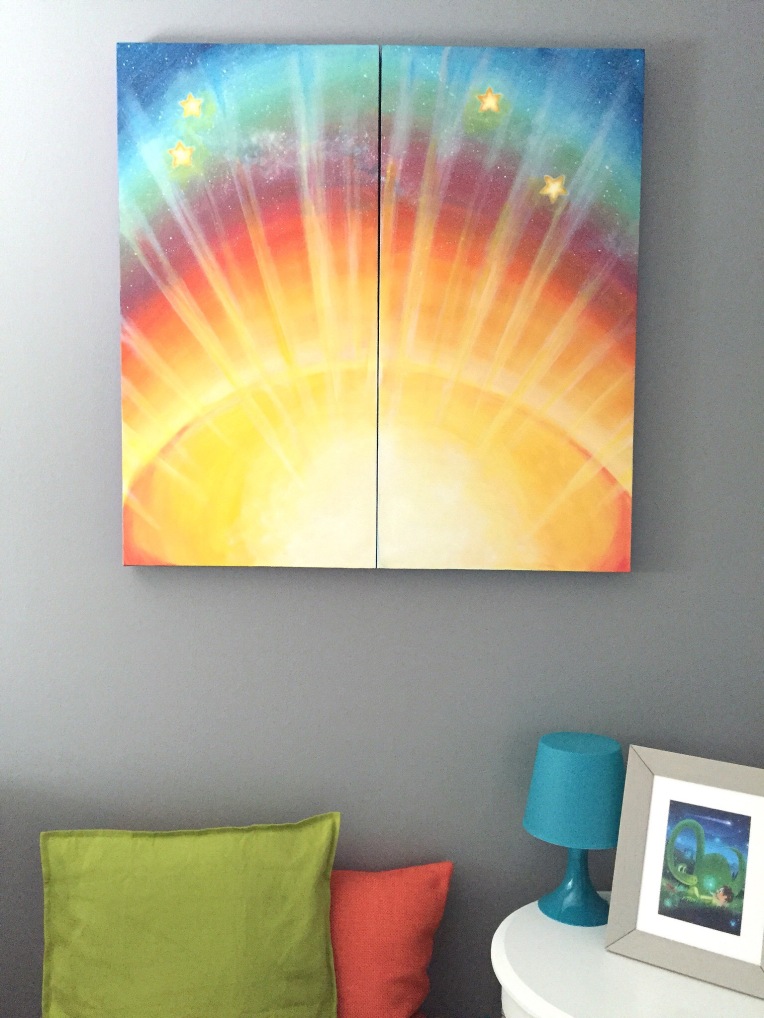
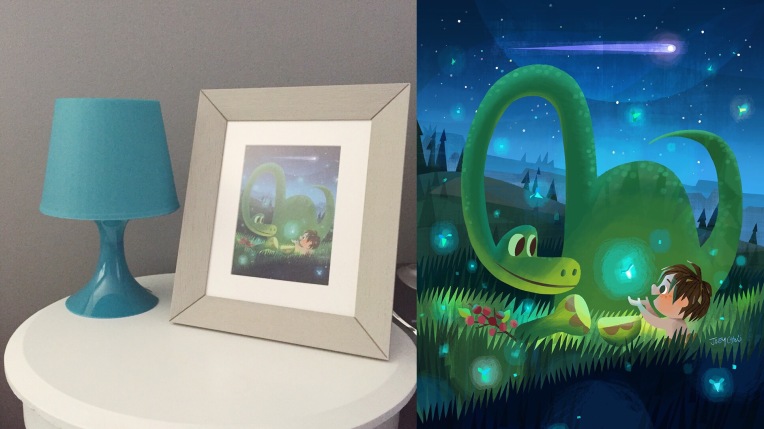
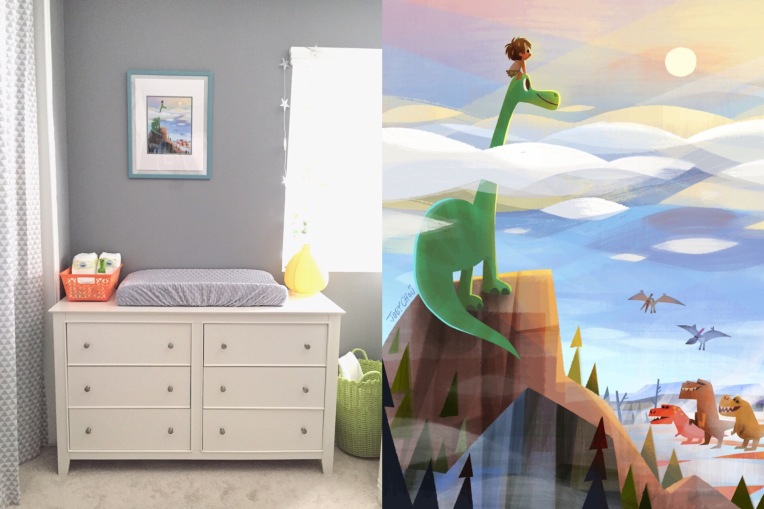
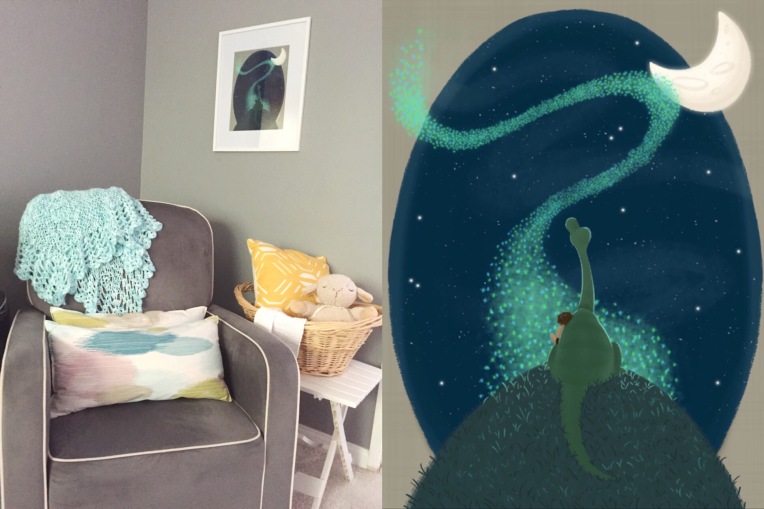
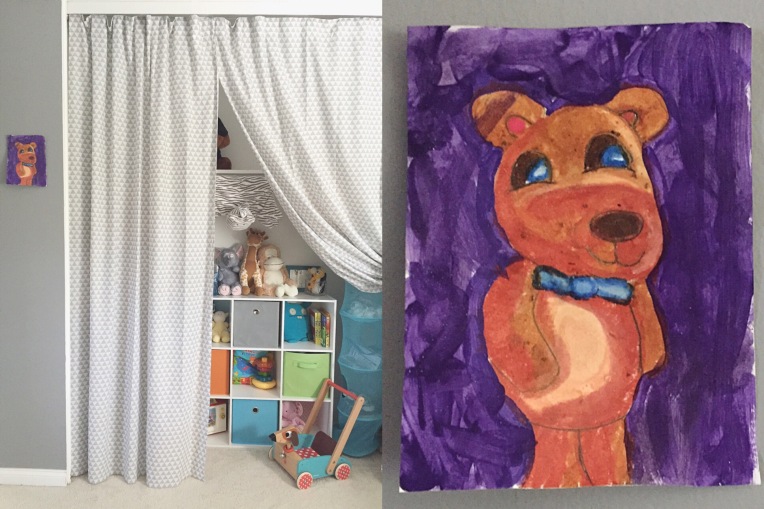
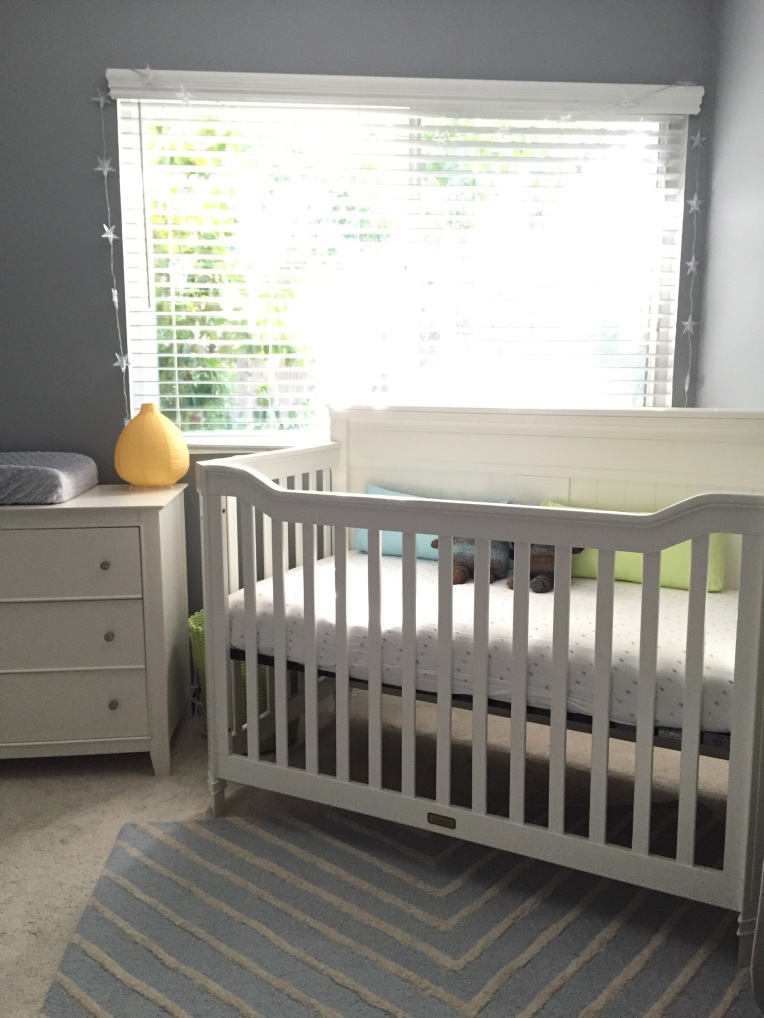
It was very hard to come up with a theme for the room.  I knew the color palette I was looking for (orange, lime green, blues, grey).  The question was how to make this room their own while still reusing a lot of my daughter’s baby things and for us, the answer was in the artwork.

Our cousin, Laura from The Corner of Knit and Tea, is a superstar knitter (you may remember her from her Guest Peace!) and crafted these adorable bunnies.  I love how they are similar but different, plus they make great companions for the boys’ monthly photos.

img_0674

This gorgeous piece is from my sister, Sara. She painted two canvases that fit together as one but also relate to the La Luna painting she made my daughter.

img_0667

Pixar’s The Good Dinosaur happens to be one of my daughter’s favs.  I love Disney fan art and seeing someone else’s interpretation of the characters. I fell in love with the colors and illustrations in these pieces by Joey Chou.

img_3430

img_0856

Another dreamy rendition is this one by Hayley Brynn.  I just happened to stumble across her work on Etsy and I am so glad I did! I love the companionship of Arlo and Spot and how they are so different yet such good friends, perfect for my boys.

img_0857

This work is from a good friend, Gail from Nightengail Art (Yes! Another Guest Peacer!)  Made for my daughter before she was born almost four years ago, we couldn’t move it as it looks too perfect here.

img_0671

And the best drawing of all was made by my daughter in anticipation of her two brothers’ arrival.

img_0858

The main thing I try to keep in mind while designing the nursery is to make it a space that has room to grow and I can picture the boys in here for a very long time.

img_0851

Save

Save

Mermaid Princess Party

While I was (very) pregnant with the twins, my best friend’s daughter was turning 3 and having a mermaid party. I really wanted to help even though I could barely walk through the store at the time! I didn’t know what I was going to make at first but I knew that I would use whatever I could find at the dollar store in one trip.

Looking for anything mermaid or princess, I decided to pull together some centerpieces.My daughter and a I spent some quality art time together dipping shells in fuschia, aqua, and green glitter…

and we carefully placed them in the bowls on top of the glass beads with the mini tiara combs.I wrapped jeweled ribbon around the top of the bowl and glued small styrofoam balls to look like pearls.After everything was done, each centerpiece probably cost about $3 a piece. Such a steal and perfect for the mermaid princess’ special day!I had some leftover shells and pearls. How cute are these for some table confetti?


For more mermaid princess crafts, check out these tiaras and wands!

Save

Baby Album(s) Prep

My c-section date is almost a week away.  In my time before the boys arrive, I have been trying to think of as many things that I can do now to make my life easier after the births.  It is so cliche but so true that it is just harder to do these things the more kids you have and now I have two more albums to make, not just one!  I had to come up with a plan now so that this process would not be so time consuming.

I picked up a couple 8.5″ x 11″ scrapbook albums in different colors.  I want the boys to be twins but to also have their own identities and so I decided against making each one the same.Photo May 17, 10 41 29 AM.jpgCoordinated sets of scrapbook paper and animal stickers set the theme and tone for each book.  One, jungle animals and the other, sea animals.Photo May 18, 8 53 08 AM.pngThese monthly stickers by Months In Motion came in the perfect palettes to match each album.  Not only can I use them for the boys’ monthly photos but they can go in their scrapbook after.Photo May 18, 8 52 38 AM
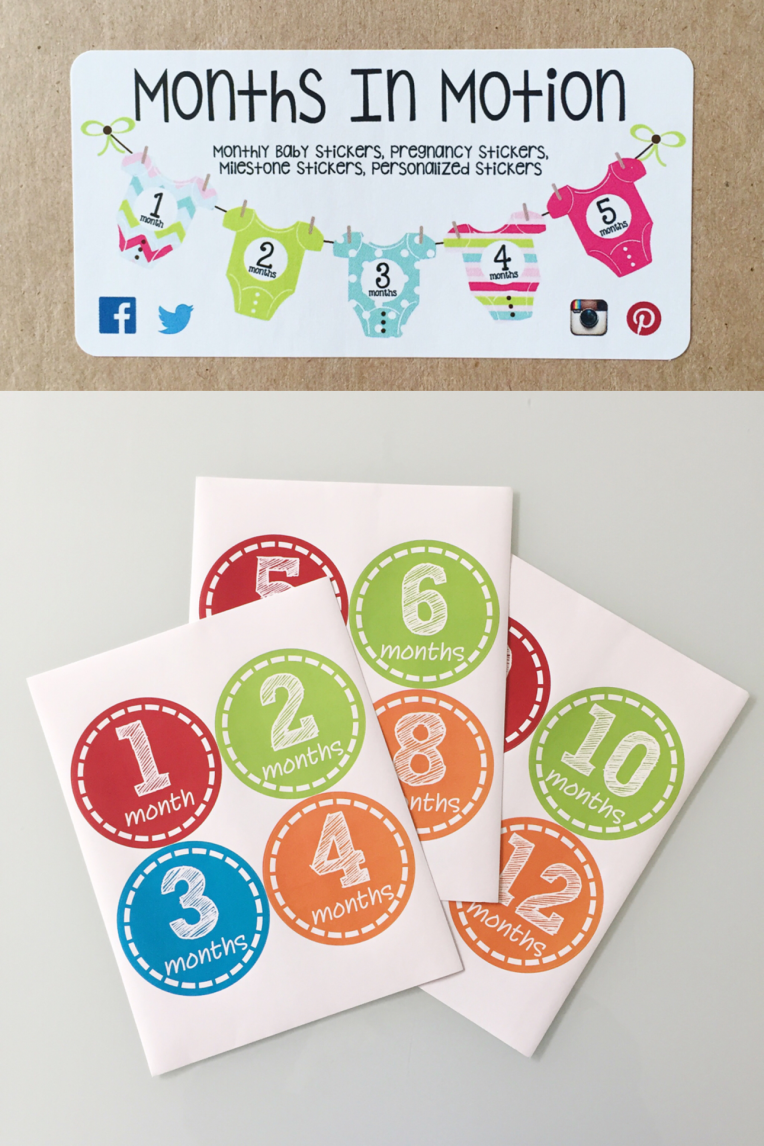
I assembled each book, choosing which page in which order and including a monthly sticker every two pages.  This will give me a two page spread for each month of photos.Photo May 17, 10 48 50 AM.jpgWe have received so many adorable cards for the boys and I hate to have to throw them away. In the past, I have made milestone frames from them, but I also love to cut out the cute parts and include them as embellishments in the albums once the photos are in.Photo May 17, 10 50 10 AM
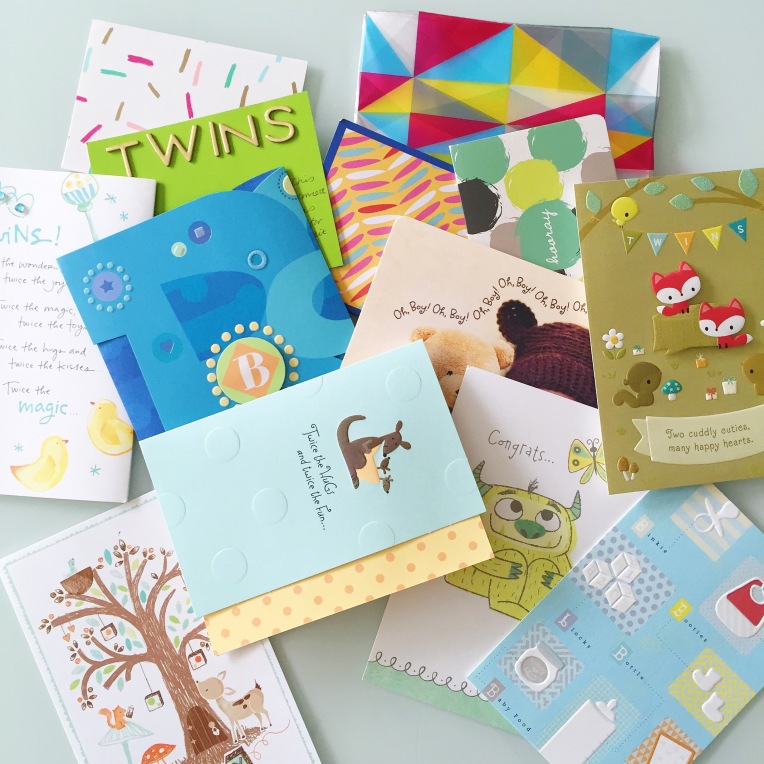
I also picked up a pack of themed cards from Project Life and will use them for more embellishment and to write little notes about the boys throughout the books.Photo May 17, 10 51 24 AM.jpgOrganizing photos is always challenging.  As we take photos of the babies, I hope to create a folder either on my phone or computer of ones that would be good for the album and to have them printed on a regular basis.

I really think this prep work will allow me to enjoy the process and to not feel overwhelmed that I have two to make!  Having all the supplies I need, ready to go, will also motivate me to actually get it done.  Wish me luck!

Save

GUEST PEACE: Cloud Quilt

I find myself pinning a lot of cute quilts on Pinterest that I envision myself making. I have absolutely no idea how to quilt though and I’m not too keen on the idea of taking a quilting class or doing research. When I saw a cute cloud appliqué quilt that I really wanted to make for my friends baby, I decided to just give it a go by cheating.

I picked out some pretty material patterns that I thought were complimentary and white cotton with little white spots for the quilt. The pattern pieces were the little remnant samples form Joann’s so they were really cheap.

I printed a cloud template from the Internet and began cutting out clouds. I quickly realized however, that the material would fray. I went back to JoAnn’s and found some fusible fleece to iron on to the back of the material so it wouldn’t fray. I picked the fleece because it offered some padding to make the clouds stand out.

Once I cut out all the clouds I pinned them onto the white cotton material and hand sewed them in place.

Following that I cut out rain drops with the remaining material and sewed them on under a contrasting color cloud. I used an embroidery hoop to help with this. This hand sewing process took a lot of time and my poor fingers got tired. I know there’s a clever little trick with the sewing machine to sew on small appliqué like this, I just didn’t know what it was and additionally, doing it by hand meant I could park myself on the couch, in front of the TV while I did it. Once I finished sewing on the clouds and raindrops I matched up the batting and back piece of cotton for the quilt. Now here’s where all proficient quilters will shake their heads in disapproval. To create the “quilt” effect I just sewed across with the sewing machine and created squares. I started in the middle and worked out so that it would be even and it was definitely tricky to keep in a straight line. There were a few instances where the material got caught up as the machine met a section that had already been sewed in the opposite direction but all in all it turn out fine. Finally I added on the trim to finish it off.
With a couple of left over clouds, I embroidered “For Aria, with Love” and sewed them on the back of the quilt.

It didn’t turn out perfect but hopefully that adds to the charm of this homemade project. I shipped it off all the way to my good friend Melissa in Singapore for her beautiful baby girl, Aria. I hope Aria has hours of fun tummy-time on this fun little “quilt”.

IMG_7534
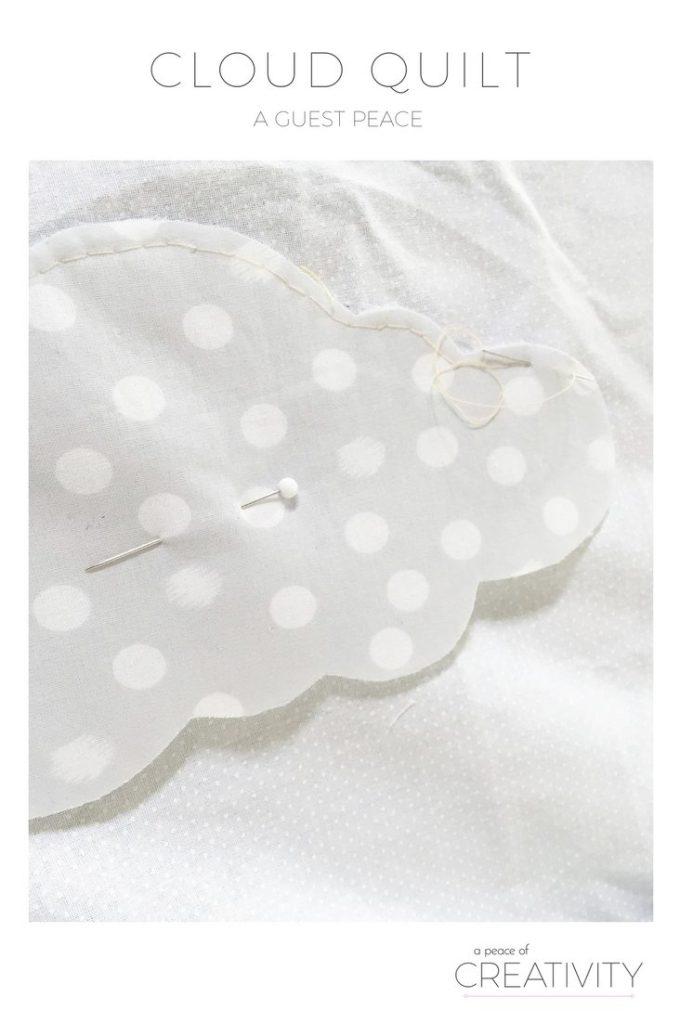
Samantha is from England but has been in the U.S. for almost 8 years. She has been an amateur knitter most of her life after her grandmother taught her at an early age. She loves crafting but struggles to complete projects. She has recently started making what she calls “cheat-quilts” – sewing quilts without using any correct technique. Samantha loves making gifts for friends kids and any time she completes a project she is very happy. She says that the best part about crafting is the relaxation it provides so she never takes any project too seriously.

See Samantha’s other Guest Peace: A Fun Christmas Jumper!

Save

Save

A Birthday to “Lava”

Our little girl turned 3 last month. How time flies! One of her favorite movies is the Pixar animated short, Lava, about a Hawaiian volcano looking for love. It was the perfect theme for her birthday party.

As the guests arrived, Lele, the volcano’s love greeted them with a lei.   The paper umbrella wreath found a home on the front door with a pink ribbon.  The backyard was where most of the party would take place.

  Simple colored glass vases doubled as centerpiece as well as holding down colorful napkins on the picnic table.

  The same leis that greeted guests at the front door were strung together and hung under the pergola for some eye popping color. Fake, tropical leaves were stapled onto a rope and hung from the eaves of the house.  Paper lanterns and honeycombs were hung from the trees.  Both the tropical leaves, lanterns and honeycombs were from previous events I had planned.  Holding on to certain decorations can come in handy.
    For the kiddies, there was a plastic pool with balls and another splash pool with water.
  Uku’s Fishing Hole let them catch colorful fishes of their choice.   And a sandy treasure hunt let them dig for gold coins, jeweled rings and beaded necklaces. Any gummy fan would have loved the favors: gummy fruits and ribbon skewers!  One of the best parts of the party was six layer rainbow and M&M cake grandma made.  Our daughter had a blast as you can tell from this photo!

See her 2nd birthday party here!

Save

Toddler Table 2

Since making the toddler table for my nephew, I figured that I should probably work on the one in my own home!

Using one of my favorite gold acrylic paints, the same one I used to paint the wedding frame, I put about two coats on the bare wood toddler table.  After drying, a quick coat of acrylic gloss really brought out all of the tiny gold sparkles in the paint.

  I love that this table is simple and classy yet perfect for my little one.  It is still a toddler table but fits right in to the decor of our living room!

Save

Toddler Table

This project was inspired by Laura who remodeled her own little Ikea LATT table. Thank you for the idea Laura!

My nephew celebrated his first birthday in September and for Christmas/Hannukah, my husband and I thought it would be the perfect time to get him his own little table.  We wanted to customize it to match the furniture in their home, so my hubby tried staining for the first time.

It was helpful that the table comes unassembled as we were able to lie them out all outside.  The smell of the stain was pretty strong.  Being novices, my dad suggested we use a rag rather than a brush.  We also learned that it is better to take long sweeping strokes rather than short ones.

img_7957While my husband tackled the staining, I worked on the seat cushions inside.

Using foam about 3/4 inch thick, I cut a square to fit the inner portion of the seat that comes with the chairs.  You want to make sure to leave those flaps on the sides of the seat uncovered so that they can slide into the assembled seat when building the chair. I cut the fabric with enough room on each end in order to fold them over to the back.
After folding the fabric over, I used a staple gun to affix it to the back and cut the excess fabric.

After assembling the chair, I was able to slide in the cushion to see the finished product!
It was great to give it to him.  We could tell he loved it and hopefully it doesn’t give his parents too much of a heart attack when he tries to stand on it! 🙂

Save

Save

Seussical Headbands

One of our favorite things to do with our daughter (other than Disneyland, of course) is to take her to local shows and plays performed by other children.  She sits there in awe throughout the entire thing, loving each song and all of the sets and costumes.

Similar to when we went to see The Little Mermaid with our close friends, I wanted make something fun for the girls to wear to see Seussical, The Musical.  I was excited to make something quirky and colorful to match the Dr. Seuss style and took a trip to the dollar store for supplies!

I decided on headbands and gathered some pom poms, beads, pipe cleaners, fuzzy hair ties and foam stars. Using a hole punch, I made a hole in the center of each star.

Processed with VSCOcam with c3 preset

Wrapping the pipe cleaner around the headband, I was able to pull it through the middle of the star and affix a felt circle to the back with glue.

I glued on the fuzzy hair tie, added some beads and spiraled the pipe cleaner.  To finish it off, I added different color pom poms to the top and side of the headband.

Since I made these the day of the play, I used a glue gun.  No drying time needed!

Processed with VSCOcam with c3 preset

My daughter is very into arts and crafts. (Surprise, Surprise! I know!) She wanted to make bracelets for her friend as well.

Although the play was so much fun on its own, the headbands really got them in the spirit. Plus, how adorable do they look on these goofy girlies!

Save